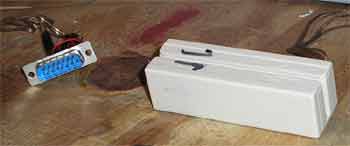
What our finished project will look like. (Click for larger image)
Parts List
- TTL Magstripe Reader - These can be found on the Internet for from sites like Digikey and Jameco. Personally, I use Omron's V3A family of readers, specifically the V3A-4, since it offers exactly what we need. Expect to spend ~$15-30 dollars.
- DB-15 Male Connector - This is a joystick connector, with solder points. Jameco carries it here. Make sure you don't buy a DB-15HD connector, commonly known as a VGA connector. Your local Radioshack doesn't carry DB-15 connectors. Expect to pay less than $1
- Cat 5 cable or wiring - We need about 3-4 feet of Category 5 cabling, which will make up our cable. This needs to go all the way to the back of your computer, so don't make it too short. You can buy this at Home Depot, or other home improvement stores. You can also use speaker wire.
- Odds and ends - You will need solder, a soldering iron, electrical tape, and possibly a hot glue gun. I use the hot glue to secure my soldered wires, and make sure I don't get any shorts.
- Time - Project takes about 15-20 minutes, depending on how quickly you can solder.
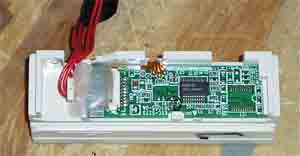
Make sure you can get the data sheet for your TTL reader, and that it supports Track 2. Check the manufacturers site. Using the pinout from the data sheet, solder wires from the Cat 5 cable to the 5V, GND, DATA, and CLK pins, making sure you are using the CLK/DATA pair for Track 2 if you reader supports multiple tracks. The contacts you have to solder to could be quite small; after soldering the wires, I covered the contacts on the reader with hot glue to make sure they wouldn't shift, break, or short each other out. Take your time and solder carefully.

Close up on the solder points, with hot glue to protect against shorting or arcing. (Click for larger image)
Next, solder the opposite ends of the wires in the Cat 5 cable for 5V, GND, DATA and CLK to the DB15 connector to was shown in here:

Circuit diagram to connect wires to TTL reader to DB-15 connector
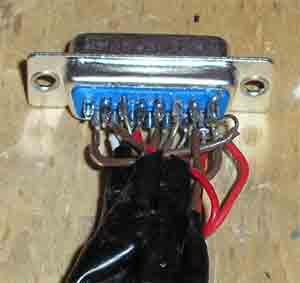
The end of your DB-15 connector will end up looking something like this:

Joystick plug after wires have been soldered to it. (Click for larger image)
Feel free to use hot glue to seal these solder points on the DB-15 connector. A word of warning: not all the grounds on a game port will really be grounds. Check using a LED to make sure the 5V and GND going to your reader are really active.
If you don't have a game port on your PC or laptop, please continue construction with our Parallel Port Adapter. If you want to know how to modify your reader to read all 3 tracks with only a single track reader, go to our Modification page.
You reader is now complete! Download the latest version of Stripe Snoop and you are set. There are lots of other fun applications you can do with a magstripe reader. I built a working Coke machine!.
Last Updated:
